Selenium AutoIt: How to Automate Non-Browser Based Functionality
My team is working on a project using Behavior Driven Development (BDD) and Java. Our main application is browser-based, so we’re also using the Selenium WebDriver with Java; however, our application also has other thick client applications integrated into it.
Most of our automation efforts are fine when using Selenium with BDD, but issues arise whenever we need to perform actions against the thick client applications when testing certain workflows. What to do?
The best solution I’ve found around these issues is to use AutoIt, a freeware application designed to help automate Windows-based UIs. The normal procedure is to create AutoIt scripts using the built-in BASIC-like programming language, but that isn’t an optimal solution for my team.
Instead, to still be able to develop in Java in our normal IDE we are accessing AutoIt through COM using Jacob, which is a Java COM bridge.
Also — rather than have everyone that needs to run the tests install another product — AutoIt– we can get around it simply by registering the AutoItX3 DLL.
This might sound complicated, but following the steps below should get you up and running in no time.
The Selenium AutoIt Solution
First you need to configure your machine:
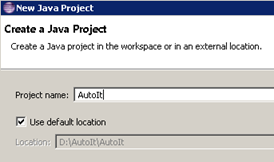
- Fire up Eclipse and Create a new Java Project named AutoIT
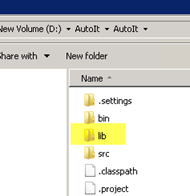
- In the Windows directory where the AutoIT project is saved, create a new directory named lib
 ‘
‘
- Download the JACOB Java COM bridge:
http://sourceforge.net/projects/jacob-project/
- Download the AutoIt Zip file option:
http://www.autoitscript.com/site/autoit/downloads/

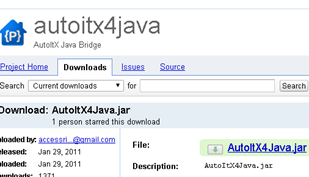
- Download the AutoItXJava.jar file:
https://code.google.com/p/autoitx4java/downloads/list
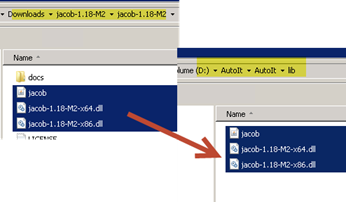
- Navigate to where you placed the Jacob zip file and extract it.
- Copy the jacob.jar, jacob-1.18-M2-x64.dll and jacob-1.18-M2-x64.dll filed and place them in the AutoIT>Lib folder we created earlier.
- Navigate to where you downloaded the AutoItX4java.jar file and copy it into the AutoIt>Lib directory.
-
Your AutoIT >lib directory should now have these four files:
- AutoItX4Java.jar
- Jacob.jar
- Jacob-1.18-M2-x64.dll
- Jacob-1.18-M2-x86.dll

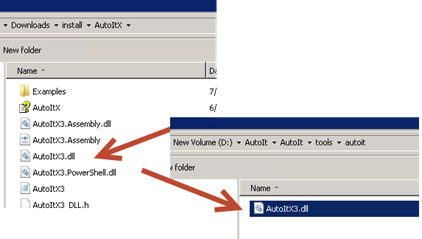
- Create another folder under your project named tools/autoit
- Navigate to the folder where you extracted AutoITÂ and copy the AutoItX3.dll and the AutoItX3_x64.dll into the tools/autoit directory.
- In Eclipse, right click on the AutoIt project and click Refresh
- Right click on the AutoIt project again and select Properties
- Under the Java Build Path, click on the Libraries tab.
- Click on the Add JARS.. button.
-
Navigate to the lib folder we created and add:
- AutoItX4Java.jar
- Jacob.jar
- AutoItX4Java.jar
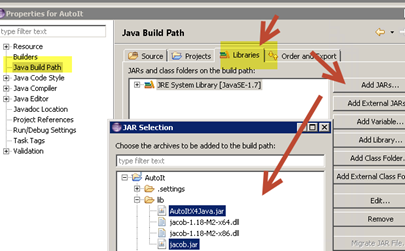
- AutoItX4Java.jar
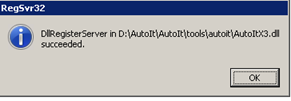
Now — so that we can use AutoIt without installing Autoit we need to register the AutoIT dll that we placed in our tools/autoit directory:
If you are using Java 32bit:
- Click on the Windows start button and enter regsvr32 yourpath/AutoItX3.dll
If you are using Java 64bit (if you don’t do this, you will get the error Can’t co-create object):
- Click on the Windows start button and enter regsvr32 yourpath/AutoItX3_x64.dll

- You should now be able to call AutoItX methods directly from Java. Let’s look at how this is done:
Use the Calculator to add two numbers
For a quick sanity check to verify that you can use ActiveIT in Java, let’s create a small test that calls the Windows calculator and adds two numbers:
- In Eclipse, right click on the AutoIt project and click Class
- In the New Java Class window, name the class CalcTest and select the public static void main option.
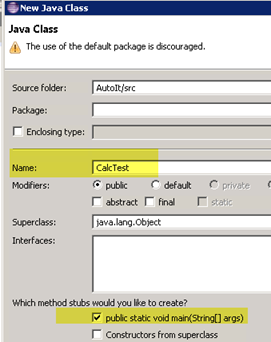
- Click finish
- At the very top of the class, add the following imports:
import java.io.File;
import autoitx4java.AutoItX;
import com.jacob.com.LibraryLoader;
- In the CalcTest class, under the main section, add the following code:
First, you’ll need to determine whether the machine you’re running this on has Java32 bit or 64bit installed. (If you know this already you won’t need this code, but if you want to run on multiple machines it might make sense for you to programmatically determine the Java bit version and load up the corresponding Jacob.dll version.)
To do this, add a method under the static void main section:
/**
*
* Returns if the JVM is 32 or 64 bit version
*/
public
static String jvmBitVersion(){
 return System.getProperty("sun.arch.data.model");
}
- Under static void main, enter:
public static void main(String[] args) throws InterruptedException {
String jacobDllVersionToUse;
if (jvmBitVersion().contains("32")){
jacobDllVersionToUse = "jacob-1.18-M2-x86.dll"
}
else {
jacobDllVersionToUse = "jacob-1.18-M2-x64.dll";
}
File file = new File("lib", jacobDllVersionToUse);
System.setProperty(LibraryLoader.JACOB_DLL_PATH, file.getAbsolutePath());
AutoItX x = new AutoItX();
x.run("calc.exe");
x.winActivate("Calculator");
x.winWaitActive("Calculator");
//Enter 3
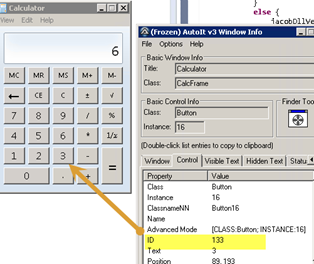
x.controlClick("Calculator", "", "133") ;
Thread.sleep(1000);
//Enter +
x.controlClick("Calculator", "", "93") ;
Thread.sleep(1000);
//Enter 3
x.controlClick("Calculator", "", "133") ;
Thread.sleep(1000);
//Enter =
x.controlClick("Calculator", "", "121") ;
}
- To get the Calculator button ids for the number 3 and = I used the Au3info application that is in the install directory of autoit-v3 that we downloaded and extracted in a previous step.
- For a list of AutoIt function’s available and how to use them, check out the AutoIt online documentation.
- Right click on the AutoIt project and select Run As > Java Application
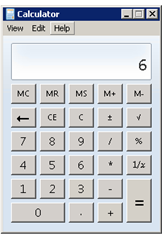
- The Windows calculator should start and enter the values 3 + 3 = 6
More Automation Awesomeness with AutoIt
How cool is that?! Stay tuned for my next post where I will show you how to use this same technique to handle non-browser based dialogs that occasionally occur when testing web applications.
Another option to check it besides AutoIt to help with these types of issues is SikuliX. Check out my post on How to Get Started with SikuliX to learn more.

Joe Colantonio is the founder of TestGuild, an industry-leading platform for automation testing and software testing tools. With over 25 years of hands-on experience, he has worked with top enterprise companies, helped develop early test automation tools and frameworks, and runs the largest online automation testing conference, Automation Guild.
Joe is also the author of Automation Awesomeness: 260 Actionable Affirmations To Improve Your QA & Automation Testing Skills and the host of the TestGuild podcast, which he has released weekly since 2014, making it the longest-running podcast dedicated to automation testing. Over the years, he has interviewed top thought leaders in DevOps, AI-driven test automation, and software quality, shaping the conversation in the industry.
With a reach of over 400,000 across his YouTube channel, LinkedIn, email list, and other social channels, Joe’s insights impact thousands of testers and engineers worldwide.
He has worked with some of the top companies in software testing and automation, including Tricentis, Keysight, Applitools, and BrowserStack, as sponsors and partners, helping them connect with the right audience in the automation testing space.
Follow him on LinkedIn or check out more at TestGuild.com.
Related Posts

I’ve talked to a lot of people who claim their tool does “agentic testing.” Most of the time it’s a […]

What is Model Context Protocol (MCP) Model Context Protocol (MCP) is an open standard that lets AI agents — Cursor, […]
Look, I’ll be straight with you. I’ve been vibe coding in Cursor for about a year and a half, and […]

Here’s the thing about API testing tools: the list has exploded. What used to be “Postman or SoapUI?” is now […]